
Brick Veneer Wall
We've been changing up the guest bedroom/den lately and started with furring out the log walls, which is basically just building a wall over an existing wall. We loved the log walls but the problem was that the original builders never sealed or treated any of them (inside or out) so spiders could pretty much just waltz right in whenever they wanted between the logs and cracks. The first wall, I dry-walled and smoothed but for the second wall, we decided to brick it. I obtained a bunch of thin brick veneers about a year or so ago FOR FREE. Driving through the neighborhood, I noticed a couple pallets of them laying out in the middle of the desert behind a church. When my dad and I knocked on the door and asked if they belonged to the church, they told us we could have them. SCORE. We made off with about 4 full pallets of real thin brick veneers. Roxy and I used most of them on the master bathroom and shower (photos soon) and the living room wall but still had a few left over. Most of the left-over bricks were cracked and broken, but they still worked by just staggering the joints and using them randomly.


I framed the wall out of 2x3's and covered it with 7/16" OSB (rough side out). Then, starting from the bottom corner, I spread stone setting cement about 2' high at a time with a notch trowel. I stuck the bricks on the wall, using 1/2" blocks of wood for joint spacers.


After all of the bricks were stuck, I mixed up some mortar and grouted the joints using a brick trowel and 1/2" tuck trowel. I'm sorry I didn't really take pictures of this part but what you do is; scoop up some mortar with the brick trowel, hold it up against the wall (even height with the joint) and scrape mortar off the brick trowel with the tuck trowel into the joint. It sounds impossible, but once you get going you become a pro and speed up pretty quick. After all of the joints are mortared, I let it dry a little while, but not completely. Once it's at this stage I use a 3/8"-1/2" striking tool, or "brick jointer", to scrape off the excess mortar and clean up the joints. Then just vacuum the walls and floor like crazy.  For the window jamb, I used some more of the old decking we ripped out of the front porch. I've also used this stuff for wall paneling and the desk/bench. I pulled the nails, ran it through a thickness planer, and put a coat of lacquer on it. I ripped the pieces down to about 5" wide, allowing it to stick a little out past the wall. Rather than trimming it out with another casing, I mortared right up to the jamb for a cleaner look.
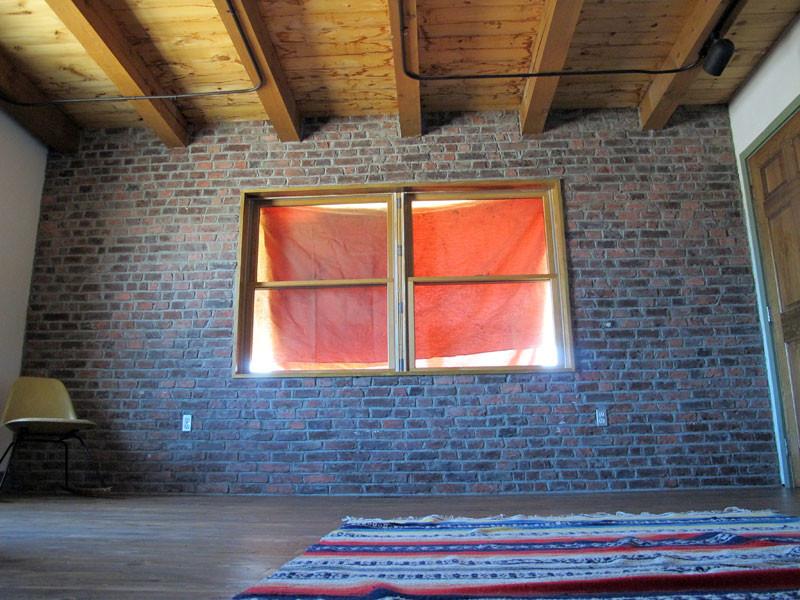


 This isn't something that really takes alot of skill, it's just sort of tedious and I'm sure there's many tutorials online that explain it better. It's amazing how much a few bricks can change the whole feel of a room though. P.S. never-mind the orange tablecloth blocking out the sun, I'm making some more roll-up canvas shades for these windows next.
Leave a comment
Comments will be approved before showing up.
Net Orders Checkout
| Item | Price | Qty | Total | |
|---|---|---|---|---|
| Subtotal |
$0.00 USD |
|||
| Shipping | ||||
| Total | ||||